> ## Documentation Index
> Fetch the complete documentation index at: https://docs.locality.dev/llms.txt
> Use this file to discover all available pages before exploring further.
# Locality Cloud guide
> Set up a Locality organization, control source access, create a sandbox key, and understand when to use Locality Cloud or Desktop.
Locality Cloud is for teams that need centrally managed access to company knowledge. An Owner or Admin connects a source, chooses who may use it, and creates a reusable workspace setup. A Developer then uses a sandbox key to materialize an approved, read-only copy of that data wherever an agent runs.
For the current hosted beta, open [api.dev.locality.dev/admin](https://api.dev.locality.dev/admin/).
## Choose Locality Cloud or Desktop
Start with the outcome you need.
| I want to... | Use | What it gives me |
| ------------------------------------------------------- | -------------------------- | ----------------------------------------------------------------------------------------------------------- |
| Work with connected apps as files on my own computer | **Desktop** | A personal mounted workspace that can pull remote changes and push reviewed edits back to supported sources |
| Decide which company data a person or agent may receive | **Locality Cloud** | Organization roles, connected sources, folder-level grants, reusable workspace profiles, and access history |
| Give a remote agent an approved knowledge snapshot | **Locality Cloud + `loc`** | A sealed, read-only filesystem replica created from a Workspace Profile key |
| Automate a personal local workflow | **Desktop + `loc`** | Commands for local mounts, status, diff, pull, and push |
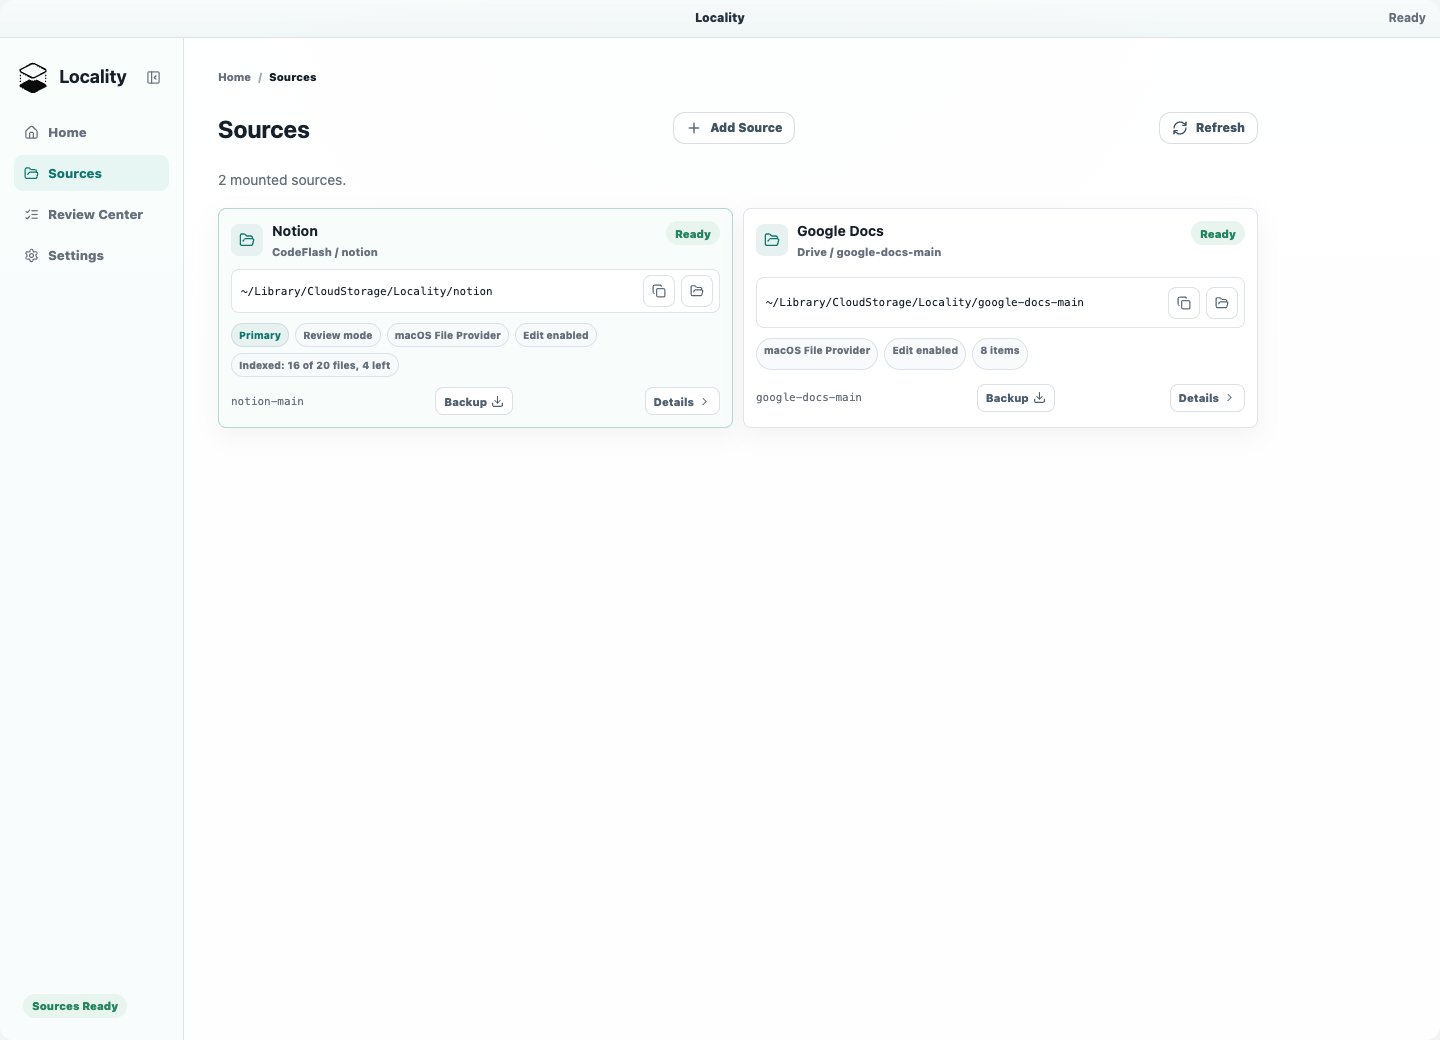
Locality Cloud and Desktop solve different problems. Connecting a provider in Locality Cloud does not create a Desktop mount. Connecting the same provider in Desktop does not add an organization source in Locality Cloud.
 ## The Locality Cloud model in one minute
The setup follows one path:
```text theme={null}
Connected source
-> Data Grant
-> Workspace Profile
-> Sandbox key
-> Read-only files for an agent
```
Each part has one responsibility:
| Part | Responsibility |
| --------------------- | ------------------------------------------------------------------------------------------------ |
| **Connected source** | Authorizes Locality to ingest selected content from a provider |
| **Data Grant** | Defines which recipient may use which folders and actions |
| **Workspace Profile** | Combines that recipient's grants, folder layout, and freshness requirement into a reusable setup |
| **Sandbox key** | Allows the recipient to launch sandboxes from one assigned Workspace Profile |
| **Sandbox** | Materializes the approved data as a sealed, read-only local filesystem |
A sandbox key is not a source-provider credential. It cannot choose extra folders or bypass a grant. It can only launch the Workspace Profile for the recipient it was created for.
## Set up Locality from start to finish
### 1. Sign in, join, or create an organization
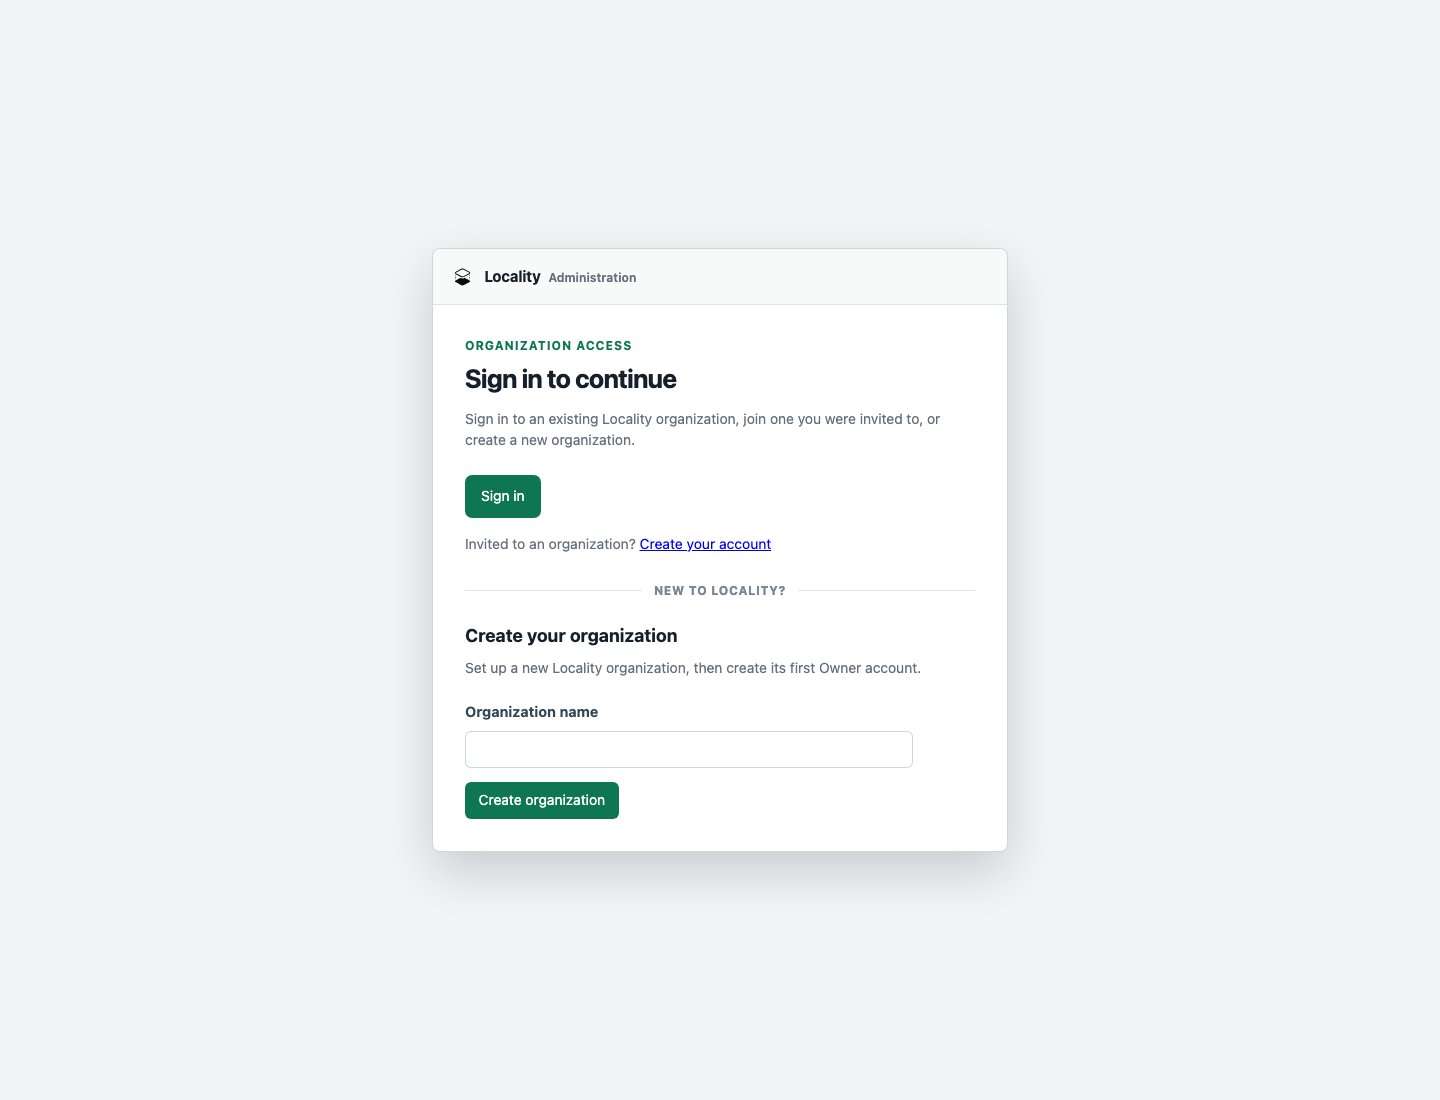
Open Locality Cloud and choose the path that matches your situation:
* **Sign in** if you already belong to a Locality organization.
* **Create your account** if an Owner or Admin invited you.
* **Create organization** if your company is new to Locality. Enter the organization name, then create the first Owner account.
## The Locality Cloud model in one minute
The setup follows one path:
```text theme={null}
Connected source
-> Data Grant
-> Workspace Profile
-> Sandbox key
-> Read-only files for an agent
```
Each part has one responsibility:
| Part | Responsibility |
| --------------------- | ------------------------------------------------------------------------------------------------ |
| **Connected source** | Authorizes Locality to ingest selected content from a provider |
| **Data Grant** | Defines which recipient may use which folders and actions |
| **Workspace Profile** | Combines that recipient's grants, folder layout, and freshness requirement into a reusable setup |
| **Sandbox key** | Allows the recipient to launch sandboxes from one assigned Workspace Profile |
| **Sandbox** | Materializes the approved data as a sealed, read-only local filesystem |
A sandbox key is not a source-provider credential. It cannot choose extra folders or bypass a grant. It can only launch the Workspace Profile for the recipient it was created for.
## Set up Locality from start to finish
### 1. Sign in, join, or create an organization
Open Locality Cloud and choose the path that matches your situation:
* **Sign in** if you already belong to a Locality organization.
* **Create your account** if an Owner or Admin invited you.
* **Create organization** if your company is new to Locality. Enter the organization name, then create the first Owner account.
 The first person who creates an organization becomes its Owner. Other people should join through **Team**, not create another organization for the same company.
| Role | Use it for |
| ------------- | --------------------------------------------------------------------------------- |
| **Owner** | Organization ownership, roles, sources, access policies, profiles, and operations |
| **Admin** | Sources, grants, profiles, Developers, and day-to-day operations |
| **Developer** | Assigned Workspace Profiles, personal sandbox keys, and personal sandbox history |
### 2. Add the people who need access
An Owner or Admin opens **Team** and selects **Add team member**.
* Choose **Existing organization member** when the person already has an active account in the organization.
* Choose **Send invitation** when the person has not joined yet. The invitation is valid for seven days.
* Choose **Developer** for someone who only needs assigned data in sandboxes.
* Use **Admin** or **Owner** only when the person must manage organization-wide access.
The person must appear as an active member before you can assign a Workspace Profile to them.
### 3. Connect a source and choose content
Open **Sources** and select an available provider. The connection buttons shown there are authoritative for your environment. Complete the provider's authorization flow, return to Locality, and choose the content that this organization should ingest.
The selection step depends on the provider:
* For **Notion**, select pages or databases as top-level roots. You can select up to 16 roots, and child pages beneath them are included. If a shared root is not discovered, paste its Notion URL or ID.
* For **Slack**, select the channels to include. Slack appears only in environments where hosted Slack is enabled.
* Future providers can use their own content picker while keeping the same Data Grant and Workspace Profile flow described below.
Finish the provider-specific setup and wait for the source to become **Ready** before creating access rules.
| Source status | Meaning | What to do |
| ------------------- | --------------------------------------------------------------- | --------------------------------------------------------------- |
| **Setup required** | Authorization succeeded, but content still needs to be selected | Finish the setup shown on the source card |
| **Ingesting** | Locality is discovering, validating, or importing content | Keep the page open or return later and refresh |
| **Ready** | A usable snapshot is available | Continue to **Access** |
| **Needs attention** | Setup, authorization, or freshness needs review | Read **Action required**, review setup, then refresh the status |
Each source card is an independent connection. Connect the same provider again only when you intentionally need separate authorization or a separate content boundary.
### 4. Create a Data Grant
Open **Access** and select **New data grant** under **Step 1**.
1. Give the grant a clear name, such as `Quarterly reporting data`.
2. Choose the named team member as the **Recipient**.
3. Choose the connected source and folders.
4. Keep **Read files** enabled.
5. Add **Search** or **Download attachments** only when the workflow needs them.
6. Review the plain-language preview and select **Publish data grant**.
The Recipient list can include human team members and system identities. For a normal team workflow, choose the person's name marked as a team member. Do not choose a workload or service identity unless your administrator created it for that specific automation.
One grant belongs to one recipient and one source connection. You can reuse it in more than one Workspace Profile.
### 5. Create a Workspace Profile
Under **Step 2**, select **New workspace profile**.
1. Name the intended job, such as `Quarterly analysis`.
2. Select one or more existing Data Grants.
3. Choose the maximum acceptable data age.
4. Confirm the folders that will appear in the sandbox.
5. Select **Create workspace profile**.
All grants in one profile must have the same recipient. If two people need the same folders, create a grant and profile for each person. This keeps every key and sandbox attributable to one identity.
The data age setting is a freshness requirement, not a refresh schedule. When the published data is older than the selected age, Locality requests a refresh and waits for up to one minute. Sandbox creation stops if the requirement still cannot be met.
### 6. Assign the profile
Return to **Team**, find the Developer, choose the Workspace Profile, and select **Assign**.
Assignment makes the profile appear under **Your access** for that Developer. It does not expose a key. The Developer creates and controls their own key in the next step.
### 7. Create and save a sandbox key
There are two supported paths:
* A Developer opens **Team**, finds an assigned profile under **Your access**, and selects **Create key**.
* An Owner or Admin opens **Access**, finds the profile, and selects **Create key**.
Give the key a recognizable name such as `Analyst workspace`. Copy it immediately.
Locality shows the plaintext key once and stores only its hash. Treat it like a password. Do not put it in a command argument, shell history, source file, log, issue, or chat message.
### 8. Materialize the workspace with `loc`
Install the current Locality release and confirm that the CLI is available:
```bash theme={null}
loc --version
```
Create a parent directory, read the key without echoing it, and stream it over standard input:
```bash theme={null}
mkdir -p "$HOME/locality-sandboxes"
read -rs LOCALITY_PROFILE_KEY
printf '%s\n' "$LOCALITY_PROFILE_KEY" | \
loc sandbox init \
--api-url https://api.dev.locality.dev \
--root "$HOME/locality-sandboxes/quarterly-analysis" \
--profile-key-stdin
unset LOCALITY_PROFILE_KEY
```
The first run creates the `quarterly-analysis` root. Inspect the materialized files with ordinary tools:
```bash theme={null}
find "$HOME/locality-sandboxes/quarterly-analysis" -maxdepth 2 -type f | head
rg "retention" "$HOME/locality-sandboxes/quarterly-analysis"
```
Give an agent a precise path and task:
```text theme={null}
Work only inside ~/locality-sandboxes/quarterly-analysis.
Read the local guidance files first.
Summarize the assumptions used in the latest retention analysis.
Cite the local source path for every finding.
Do not claim that you changed the source provider. This workspace is read-only.
```
To refresh an existing generation-2 replica, run the same command with the exact same key and root. A replacement key for the same profile does not own the old root. After rotating or revoking a key, materialize into a new root.
## What each Locality Cloud page does
| Page | Use it to |
| ------------- | ---------------------------------------------------------------------------------------------------- |
| **Overview** | Check organization setup, source health, profiles, and recent sandbox activity |
| **Sources** | Connect providers, choose included roots, watch ingestion, and investigate source health |
| **Access** | Publish Data Grants, create Workspace Profiles, set freshness, and create administrator-managed keys |
| **Sandboxes** | Review active and recent organization sandbox sessions |
| **Activity** | Review important organization and data access events |
| **Team** | Add members, assign profiles, create personal keys, revoke keys, and review personal sandboxes |
| **Settings** | Review organization identity and administrator settings |
Developers only see **Team** because that page contains everything they need for their assigned access. Owners and Admins see the organization-wide pages.
## Common questions
### Why is Create key unavailable?
Create at least one Data Grant, include it in a Workspace Profile, and make sure every grant in that profile has the same recipient. A Developer also needs the profile assigned on **Team** before it appears under **Your access**.
### Why is source content missing?
Confirm that the content is visible to the provider connection and included in its selected roots or channels. Then check the source status and last refresh time. For Notion, a missing shared page or database can also be added by pasting its URL or ID in source setup.
### Why did sandbox creation stop on freshness?
The profile required data newer than the latest published snapshot. Check the source status and **Last refreshed** time. Resolve **Needs attention**, or ask an Owner or Admin whether the profile's maximum data age is appropriate for this workflow.
### Can a Locality Cloud sandbox edit the connected source?
No. `loc sandbox init` materializes a sealed, read-only replica for an agent. Use Locality Desktop when a person or agent needs a reviewed edit and sync workflow back to a supported source.
### When should I revoke or replace a sandbox key?
Revoke a key when its job is complete, its owner no longer needs access, or you suspect it was exposed. Revocation also invalidates capabilities and active sandbox sessions created from that key. Create a replacement key only when access should continue, and materialize it into a new root because a new key does not own an existing replica.
## A reliable first test
Use a small source scope that contains a few recognizable items. For example, a data analyst can select a reporting folder, receive one Data Grant and one Workspace Profile, then create one key. Materialize it into a new local path, verify two known files, and ask an agent to summarize one metric with file paths as evidence.
That test proves the complete path from organization authorization to source ingestion, policy, key issuance, sandbox materialization, and agent-readable files.
The first person who creates an organization becomes its Owner. Other people should join through **Team**, not create another organization for the same company.
| Role | Use it for |
| ------------- | --------------------------------------------------------------------------------- |
| **Owner** | Organization ownership, roles, sources, access policies, profiles, and operations |
| **Admin** | Sources, grants, profiles, Developers, and day-to-day operations |
| **Developer** | Assigned Workspace Profiles, personal sandbox keys, and personal sandbox history |
### 2. Add the people who need access
An Owner or Admin opens **Team** and selects **Add team member**.
* Choose **Existing organization member** when the person already has an active account in the organization.
* Choose **Send invitation** when the person has not joined yet. The invitation is valid for seven days.
* Choose **Developer** for someone who only needs assigned data in sandboxes.
* Use **Admin** or **Owner** only when the person must manage organization-wide access.
The person must appear as an active member before you can assign a Workspace Profile to them.
### 3. Connect a source and choose content
Open **Sources** and select an available provider. The connection buttons shown there are authoritative for your environment. Complete the provider's authorization flow, return to Locality, and choose the content that this organization should ingest.
The selection step depends on the provider:
* For **Notion**, select pages or databases as top-level roots. You can select up to 16 roots, and child pages beneath them are included. If a shared root is not discovered, paste its Notion URL or ID.
* For **Slack**, select the channels to include. Slack appears only in environments where hosted Slack is enabled.
* Future providers can use their own content picker while keeping the same Data Grant and Workspace Profile flow described below.
Finish the provider-specific setup and wait for the source to become **Ready** before creating access rules.
| Source status | Meaning | What to do |
| ------------------- | --------------------------------------------------------------- | --------------------------------------------------------------- |
| **Setup required** | Authorization succeeded, but content still needs to be selected | Finish the setup shown on the source card |
| **Ingesting** | Locality is discovering, validating, or importing content | Keep the page open or return later and refresh |
| **Ready** | A usable snapshot is available | Continue to **Access** |
| **Needs attention** | Setup, authorization, or freshness needs review | Read **Action required**, review setup, then refresh the status |
Each source card is an independent connection. Connect the same provider again only when you intentionally need separate authorization or a separate content boundary.
### 4. Create a Data Grant
Open **Access** and select **New data grant** under **Step 1**.
1. Give the grant a clear name, such as `Quarterly reporting data`.
2. Choose the named team member as the **Recipient**.
3. Choose the connected source and folders.
4. Keep **Read files** enabled.
5. Add **Search** or **Download attachments** only when the workflow needs them.
6. Review the plain-language preview and select **Publish data grant**.
The Recipient list can include human team members and system identities. For a normal team workflow, choose the person's name marked as a team member. Do not choose a workload or service identity unless your administrator created it for that specific automation.
One grant belongs to one recipient and one source connection. You can reuse it in more than one Workspace Profile.
### 5. Create a Workspace Profile
Under **Step 2**, select **New workspace profile**.
1. Name the intended job, such as `Quarterly analysis`.
2. Select one or more existing Data Grants.
3. Choose the maximum acceptable data age.
4. Confirm the folders that will appear in the sandbox.
5. Select **Create workspace profile**.
All grants in one profile must have the same recipient. If two people need the same folders, create a grant and profile for each person. This keeps every key and sandbox attributable to one identity.
The data age setting is a freshness requirement, not a refresh schedule. When the published data is older than the selected age, Locality requests a refresh and waits for up to one minute. Sandbox creation stops if the requirement still cannot be met.
### 6. Assign the profile
Return to **Team**, find the Developer, choose the Workspace Profile, and select **Assign**.
Assignment makes the profile appear under **Your access** for that Developer. It does not expose a key. The Developer creates and controls their own key in the next step.
### 7. Create and save a sandbox key
There are two supported paths:
* A Developer opens **Team**, finds an assigned profile under **Your access**, and selects **Create key**.
* An Owner or Admin opens **Access**, finds the profile, and selects **Create key**.
Give the key a recognizable name such as `Analyst workspace`. Copy it immediately.
Locality shows the plaintext key once and stores only its hash. Treat it like a password. Do not put it in a command argument, shell history, source file, log, issue, or chat message.
### 8. Materialize the workspace with `loc`
Install the current Locality release and confirm that the CLI is available:
```bash theme={null}
loc --version
```
Create a parent directory, read the key without echoing it, and stream it over standard input:
```bash theme={null}
mkdir -p "$HOME/locality-sandboxes"
read -rs LOCALITY_PROFILE_KEY
printf '%s\n' "$LOCALITY_PROFILE_KEY" | \
loc sandbox init \
--api-url https://api.dev.locality.dev \
--root "$HOME/locality-sandboxes/quarterly-analysis" \
--profile-key-stdin
unset LOCALITY_PROFILE_KEY
```
The first run creates the `quarterly-analysis` root. Inspect the materialized files with ordinary tools:
```bash theme={null}
find "$HOME/locality-sandboxes/quarterly-analysis" -maxdepth 2 -type f | head
rg "retention" "$HOME/locality-sandboxes/quarterly-analysis"
```
Give an agent a precise path and task:
```text theme={null}
Work only inside ~/locality-sandboxes/quarterly-analysis.
Read the local guidance files first.
Summarize the assumptions used in the latest retention analysis.
Cite the local source path for every finding.
Do not claim that you changed the source provider. This workspace is read-only.
```
To refresh an existing generation-2 replica, run the same command with the exact same key and root. A replacement key for the same profile does not own the old root. After rotating or revoking a key, materialize into a new root.
## What each Locality Cloud page does
| Page | Use it to |
| ------------- | ---------------------------------------------------------------------------------------------------- |
| **Overview** | Check organization setup, source health, profiles, and recent sandbox activity |
| **Sources** | Connect providers, choose included roots, watch ingestion, and investigate source health |
| **Access** | Publish Data Grants, create Workspace Profiles, set freshness, and create administrator-managed keys |
| **Sandboxes** | Review active and recent organization sandbox sessions |
| **Activity** | Review important organization and data access events |
| **Team** | Add members, assign profiles, create personal keys, revoke keys, and review personal sandboxes |
| **Settings** | Review organization identity and administrator settings |
Developers only see **Team** because that page contains everything they need for their assigned access. Owners and Admins see the organization-wide pages.
## Common questions
### Why is Create key unavailable?
Create at least one Data Grant, include it in a Workspace Profile, and make sure every grant in that profile has the same recipient. A Developer also needs the profile assigned on **Team** before it appears under **Your access**.
### Why is source content missing?
Confirm that the content is visible to the provider connection and included in its selected roots or channels. Then check the source status and last refresh time. For Notion, a missing shared page or database can also be added by pasting its URL or ID in source setup.
### Why did sandbox creation stop on freshness?
The profile required data newer than the latest published snapshot. Check the source status and **Last refreshed** time. Resolve **Needs attention**, or ask an Owner or Admin whether the profile's maximum data age is appropriate for this workflow.
### Can a Locality Cloud sandbox edit the connected source?
No. `loc sandbox init` materializes a sealed, read-only replica for an agent. Use Locality Desktop when a person or agent needs a reviewed edit and sync workflow back to a supported source.
### When should I revoke or replace a sandbox key?
Revoke a key when its job is complete, its owner no longer needs access, or you suspect it was exposed. Revocation also invalidates capabilities and active sandbox sessions created from that key. Create a replacement key only when access should continue, and materialize it into a new root because a new key does not own an existing replica.
## A reliable first test
Use a small source scope that contains a few recognizable items. For example, a data analyst can select a reporting folder, receive one Data Grant and one Workspace Profile, then create one key. Materialize it into a new local path, verify two known files, and ask an agent to summarize one metric with file paths as evidence.
That test proves the complete path from organization authorization to source ingestion, policy, key issuance, sandbox materialization, and agent-readable files.